A Miter Cut Versus Cope Always Creates A Debate
Let the debate continue! Almost all trim carpenters biggest debate that seems to never go away Is to weather a miter versus cope joint cut is better over the other. What most forget is both work great and it really depends which type of cove moulding you are wanting to install that will decide which process is better. A miter with a 45 degree angle cut works great on baseboard but a coped joint would work best when installing crown moulding. Now, don’t get me wrong, you could also cope all your baseboard inside corners as well rather than miter the inside cut, it’s totally up to you.

Most carpenters today take the easy way out and miter all inside corners regardless of the type of cove moulding they are installing. Knowing how to cope an inside joint requires skill. The other argument that most trim carpenters battle over is which method works best for fast production when installing trim on a tight timeline.
A job timeline should never be an underlying reason to decide weather a miter cut versus cope should be used for any installation project a trim carpenter takes on. The type of cove moulding and type of material will decide which technique to use. If the material is MDF and you’re installing some chair rail and wainscoting then a miter cut will do the trick nicely.
Key Differences Between A Miter Cut Versus Cope Joints
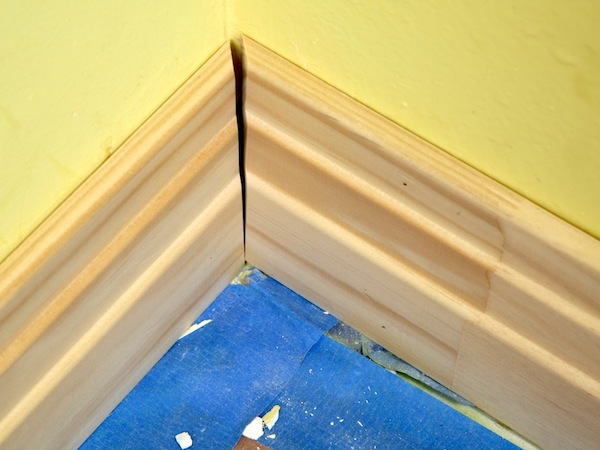
It’s important to know the differences between a miter cut versus a cope joint. A miter cut is used in this context when to pieces of trim moulding material meet at an inside corner of a wall or ceiling. Two cuts are made, both at 45 degrees to allow both pieces transition so the moulding is seamless once its installed. A cope joint is when a piece of trim is installed against a wall without any miter cuts at the inside portion of an inside corner, the cope joint is when the next piece of trim is installed while sliding over the already installed piece of material to form a tight joint.
Any trim contractor should offer the coping method as part of their installation services.
Best Tools for Miter Cuts
Any type of miter cut or angle can be done with a simple miter box, knowing how to place the material in the box is the secret to achieving the cut you want. Yet in todays industry, most professional trim carpenters no longer use a miter box while working o job sites, even though a miter box could preform the cuts as equally well to a power tool like a miter saw, a miter box is not an efficient tool in getting the job done in a timely manner.
All carpenters today use a miter saw, this massive tool has evolved to a “must need tool” in any contractors tool box. The trick when mitering your inside  corners is to always confirm the angle of the cut, not all inside corners are a perfect 90 degrees. Having an angle finder is key to the first step in mitering any inside corners. The next step is setting up your miter saw to the right degree cut. If you’re cutting baseboard it’s key to hold the stock wood firm against the miter saw fence while making the cut.
A miter saw is sold in various blade sizes and features as well. A compound sliding miter saw with a 12 inch blade size is the choice for most contractors as this modal can miter on a bevel as well. The other feature is that it slides to help cut bigger stocks of wood when standing the stock up against the saw fence.
A bevel cut is typically used when cutting a trim cove moulding exceeds the height of the saw blade, so the operator will bevel the blade in order to achieve the same cut angle while the stock material is lying flat and not upright against the saw fence. A great power tool that has replaced the simplistic miter box that can create outstanding precision cuts without breaking a sweat.
Which Tools Work Best When Coping Cove Moulding Inside Corners
Just like performing a miter cut with simple miter box, the same exists with a simple tool when wanting to cope a joint. A infamous coping saw is used to 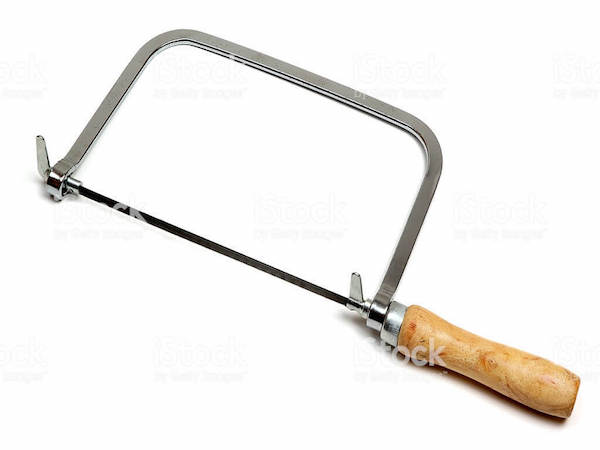 remove all the waste from an inside corner no matter if you are coping baseboard, crown moulding or chair rail, the good old and reliable coping saw does the rick with ease. Now, unlike the miter box in which professional trim carpenters no longer use, the coping saw is still used today as a primary tool from any type of contractor on major job sites.
Some will argue that using a coping saw will limit high production installation regardless of the scale of work needed for any particular job. As well as using a coping saw requires some skill in order to perform the cope properly while not cutting the operator during the process. Yet, even with all these issues, most carpenters prefer a coping saw while using other coping techniques as it’s their tool of choice. Another technique that is becoming more popular is an angle grinder. It’s fast and if done right, extremely accurate in removing all the waste from your stock material to achieving a coped joint.
Coping Baseboard or Crown Moulding with a Jigsaw
This has become a very popular coping trim technique over the past few years, thanks to a accessory for your Jigsaw called the Collins Coping Foot that is easily swaps out your Jigsaw’s plate with. This technique is not as dangerous as most think, when a trim carpenter apprentice is taught this method, the first question asked is, how likely am i to lose a finger? Actually you are more likely to hurt herself using a miter saw than you are likely using a jigsaw. Having said that, the  operator must pay full attention while using any power tool. The reason why most who are not familiar with coping a moulding joint with a Jigsaw is because the tool is not held in its traditional upright manner when coping an inside corner on cove mouldings. Rather the tool is held upside down and placed in a jig that is clamped down to a wood working table.
This technique is wonderful for high production as well as having the best coped joint without any gap once the cove moulding slides over the adjacent cove piece that has already been installed. If done correctly, a coped joint will not need any wood filler in any abutting joints. Applying the paint will be enough to hide any opened seams because a coped miter joint is extremely tight unlike a typical miter cut where having a ting gap is more likely due to walls not being plumb or having straight 90 degree angles to work with.This is why many top trim contractors prefer a coped cut over a miter cut.
Ultimately this is a debate that will never end, deciding weather a miter cut versus cope when installing any type of cove moulding is more about contractor preference while installing the material. To be honest there isn’t a right answer in deciding between the 2 methods. The goal is to ensure any cove moulding that is being installed is done so in a professional and work man like manner.
Get a Free Quote
Learn How Miter5 Can Help with Your Trim Carpentry Projects