
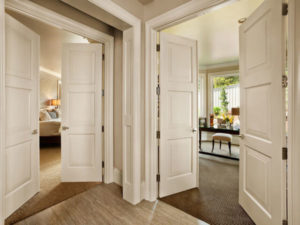
Painting Trim Panel Mouldings is an Acquired Skill
How To Prepare Trim For Final Paint
How to prepare any trim or final woodworking project is a common question by most. The DIY’er believes painting a wood product that is extremely detailed is no different than painting a simple wall or ceiling for that matter, got news for ya, it’s not. Painting trim panel mouldings has a totally different process than just pouring some paint in a paint tray and rolling paint over a wall.
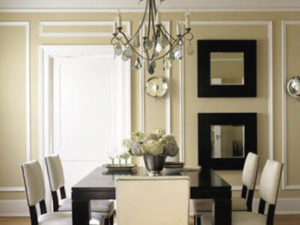
Once all your trim moulding have been installed, the very first thing prior to even applying primer is caulking all your miter or coped joints while also filling all your brad nail holes left behind from the installation. The next step is caulking the bottom and top or sides of your casings. Caulking your baseboards at the floor and wall seams while also following the same procedure for all crown moulding as well. Painting decorative panel mouldings depending on the style and design will require the most time to complete as it requires is some cases to tape all your sides in order to finish your wall colour.
Ideal Tools When Painting Trim Panel Mouldings
Your primary tools will include plaster spackle, wood filler, 2 inch painting brush, 3m fine 120 grit sanding paper, Graco paint gun and of coarse your paint colour from your local hardware store. We suggest using Benjamin Moore paints but you could also apply Behr paint from HomeDepot as well. Some might say that spackle and wood filler is not a tool rather it’s a material, well, we consider it a tool cause without these 2 products, it would be tough to achieve the smooth finish we are wanting to achieve. If your finish will be paint grade over stain your wood trim, than spackle is used to fill all your nail holes. Wood filler is used to fill and ting gap in your miter or coped joints. Once all your joints and nail holes have been filled, it’s time to use a fine 3m 120 grit sand paper to remove any rough wood or splintering from the install. If your installation material is MDF than you will not need to prime as MDF usually comes primed when it was milled.
If your finish material is poplar or pine wood, than priming first once all the trim has been sanded must be applied prior to to applying your first coat of finish paint. Any primer, regardless of the type of primer used should sit to dry for a minimum of 3 hours prior to a light sand. Once you have sanded down your material you’re ready to apply the first coat of paint. Sanding is necessary after each coat of primer and paint! Ideally all primer and paint should be applied with a spray paint but sometimes using spray paint is not permitted in doors depending on how large the job is and type of weather at the time. Spay painting discharges fumes in the air that can be harmless to the home owners, so applying paint with a 2 inch cutting brush may be your only option.
What are the Best Techniques to Painting Trim Panel Mouldings
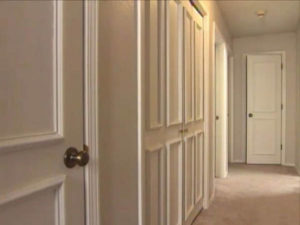
When painting trim panel mouldings best practices should always include a light sanding between each coat while letting the paint enough time to set before applying the next coat. We also suggest that it’s wise to paint your trim first before painting walls and ceilings. A 2 inch brush is easier to cut and trim profile that is installed on a wall or ceiling while also allowing you to tape your trim after it has cured enough to help cut your wall and ceiling colour.
Ideally, painting any trim, doors and window trim, spray paint if applied correctly serves best results to a silky smooth finish. Having said that, if you take your time and not rush the process, you will achieve a similar finish using a brush as your main tool. a true finish carpenter will have extensive experience in applying paint to any wood working material. When hiring miter5 for all your trim detail work, we offer the all in on solution as part of our services, being able to paint your trim, no need to hire a painter and extend the time to complete your project while also keeping costs lower.
If you’re planning to paint trim panel mouldings through a spray paint method then it’s important to keep your arms straight while not bending your wrist while you spray paint over the moulding surface. Always keep your arm perpendicular to the surface while moving at a pace so the paint is applied evenly. To avoid paint running, it’s essential to apply the paint at slow pace yet not to slow so that the paint can build-up and run.
If you’re planning to finish your trim coves with a brush than it’s key to apply the proper amount of paint over the mouldings and keeping your brush wet enough to spread the paint evenly over the mouldings as you apply the coat. Use a smaller brush so that you’re able to apply paint over tight joints and grooves around the coves without running the risk of paint runs that are to catch during the drying time.