
Wainscoting Installation in Toronto & the GTA
Miter5 provides professional wainscoting installation in Toronto and the GTA, with each layout planned around the height, proportions and existing architecture of the room. From dining rooms and hallways to stairways and renovated interiors, we install carefully proportioned wainscoting designed to look integrated with the home.
Panel height, spacing and proportions planned around the actual dimensions of the room.
Careful alignment around corners, baseboards, door casing and other architectural details.
Wainscoting designed for straight walls, hallways, dining rooms and changing stair angles.
Professional installation for existing homes, renovations and custom interior projects.
The Right Wainscoting Starts With the Layout
Wainscoting should look as though it belongs to the room, not as though panels were simply added to an empty wall.
Before installation, the height, panel widths and spacing need to be planned around the room itself. Door openings, windows, corners, stair angles, electrical outlets and existing trim all affect the finished layout. Miter5 uses those conditions to determine proportions before the individual panels are installed.
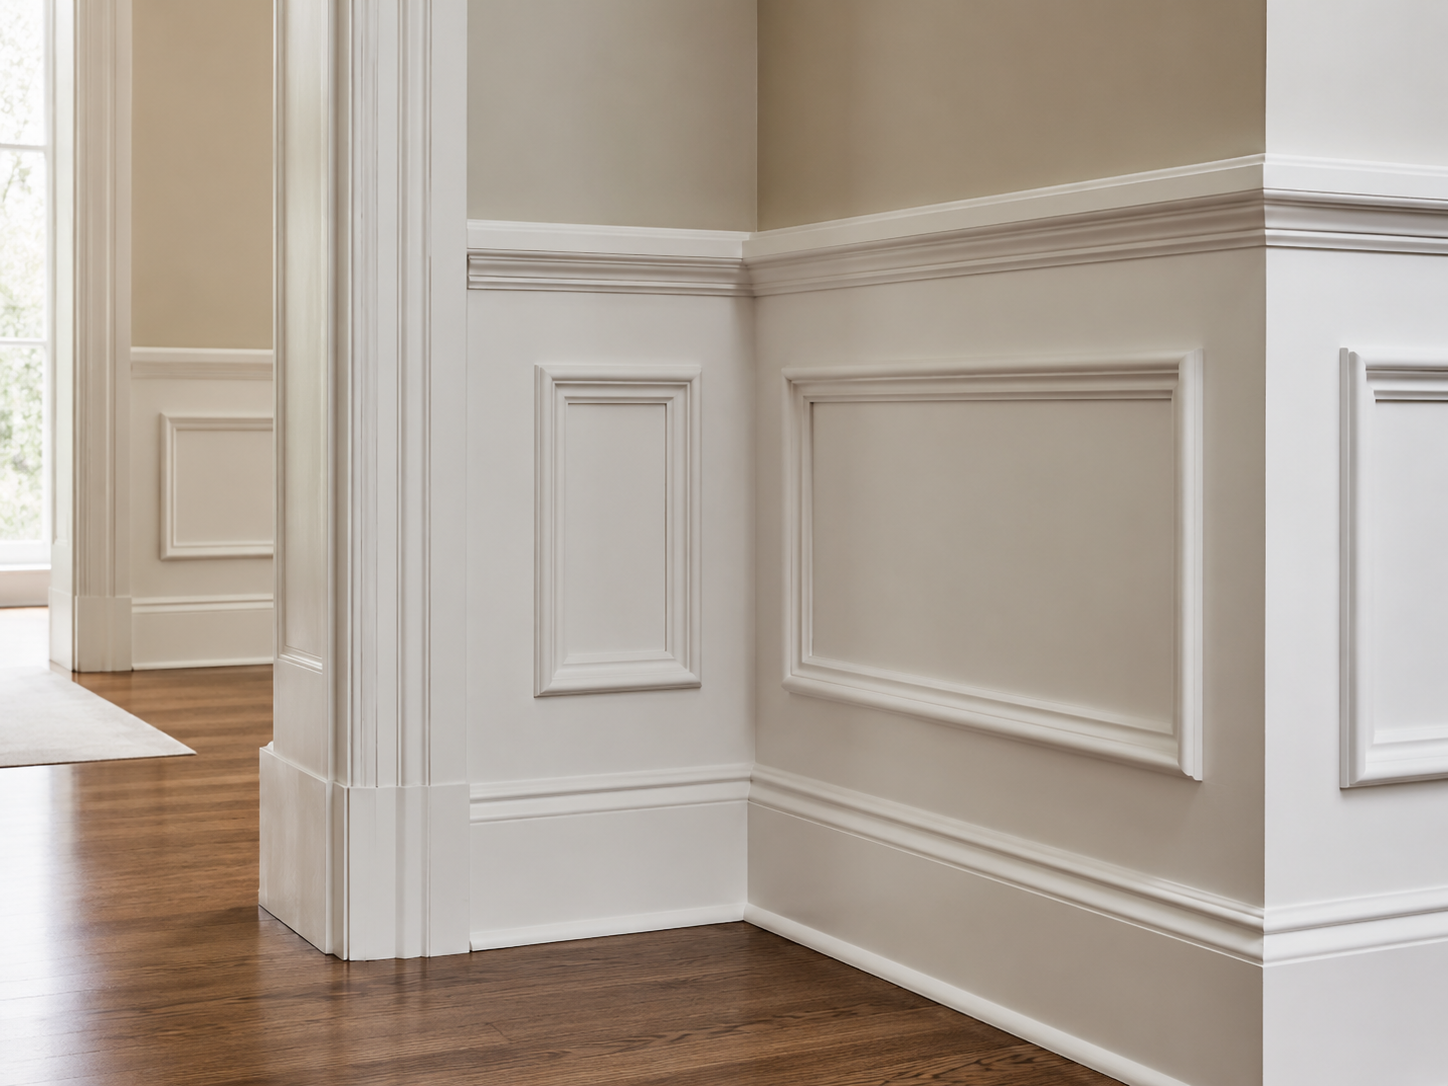
Picture-Frame Wainscoting
Applied moulding creates framed panels across the lower portion of the wall. The finished result depends on consistent spacing, balanced panel widths and clean alignment with doors, corners and the architecture surrounding the treatment.
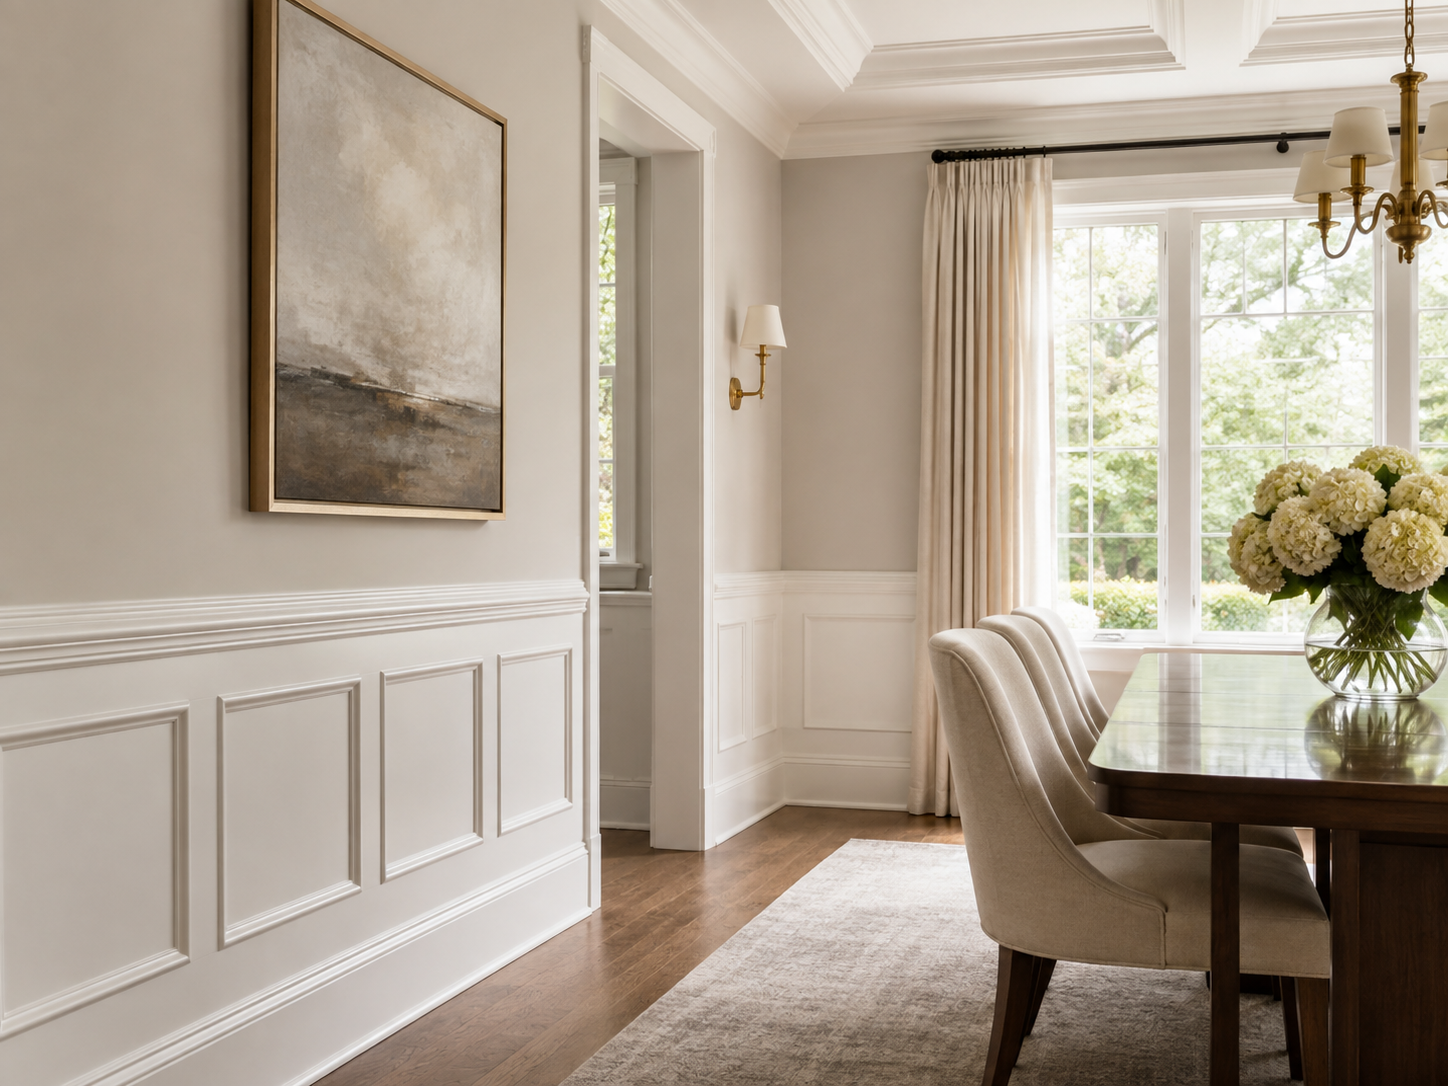
Recessed-Panel Wainscoting
Recessed-panel layouts create a more substantial architectural treatment using rails, stiles and inset wall sections. Panel dimensions and the relationship between horizontal and vertical components need to remain balanced throughout the room.
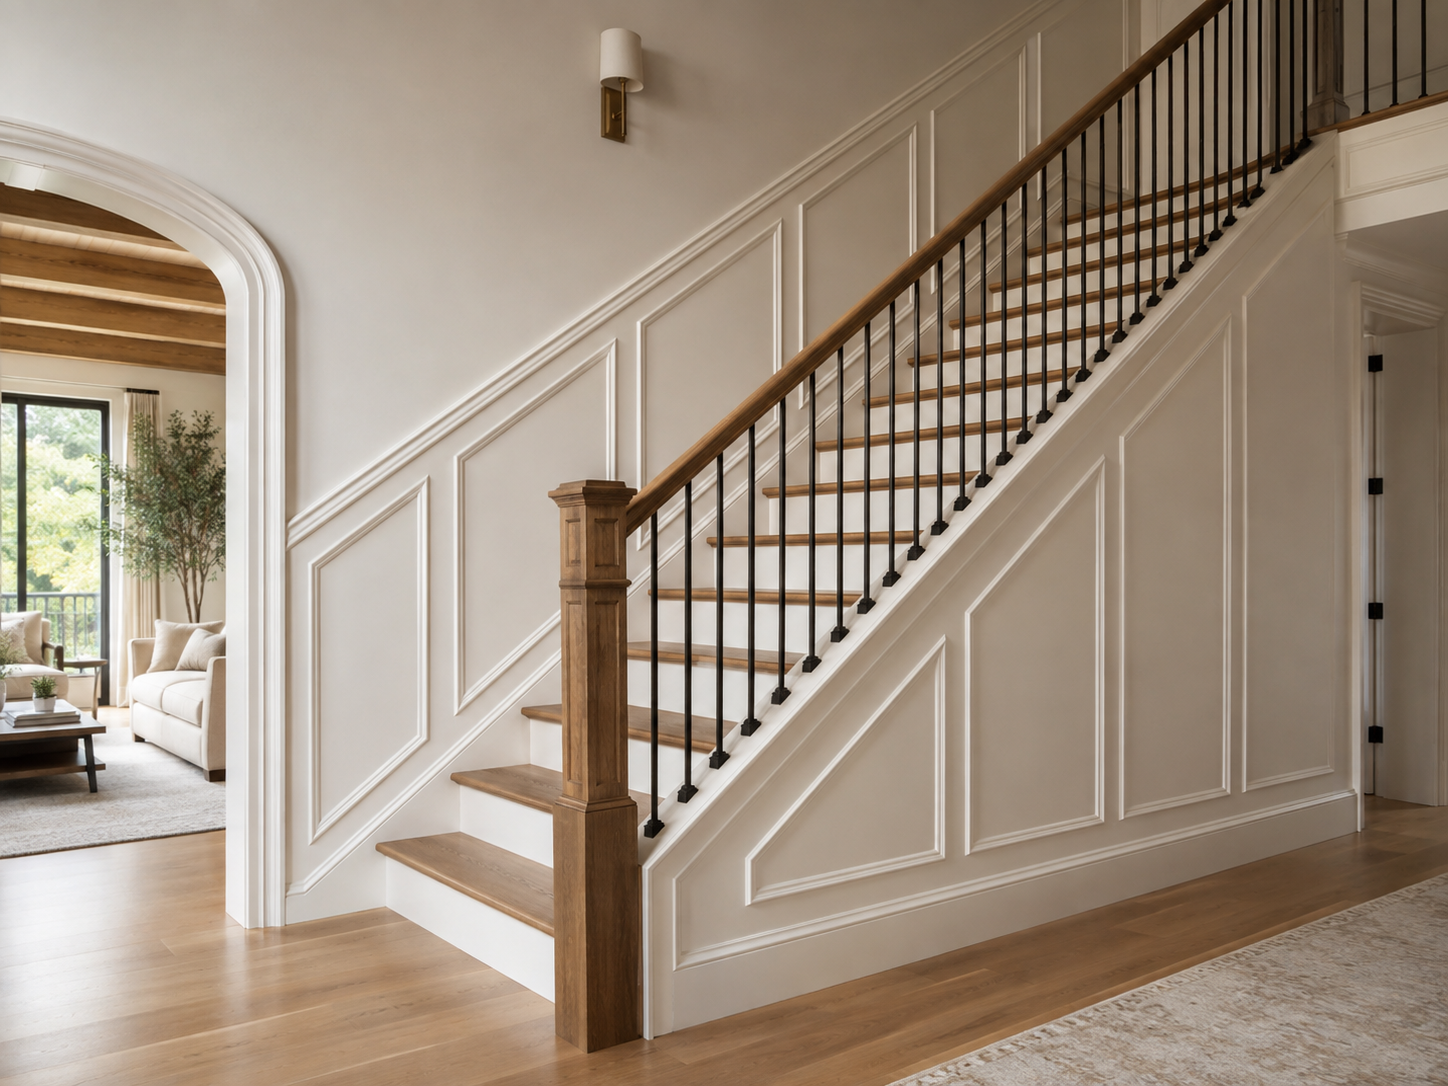
Stairway Wainscoting
Stair walls introduce changing angles that require a different layout from straight rooms. Panel lines, top rails and spacing need to follow the staircase while maintaining proportions that remain intentional from both the lower and upper levels.
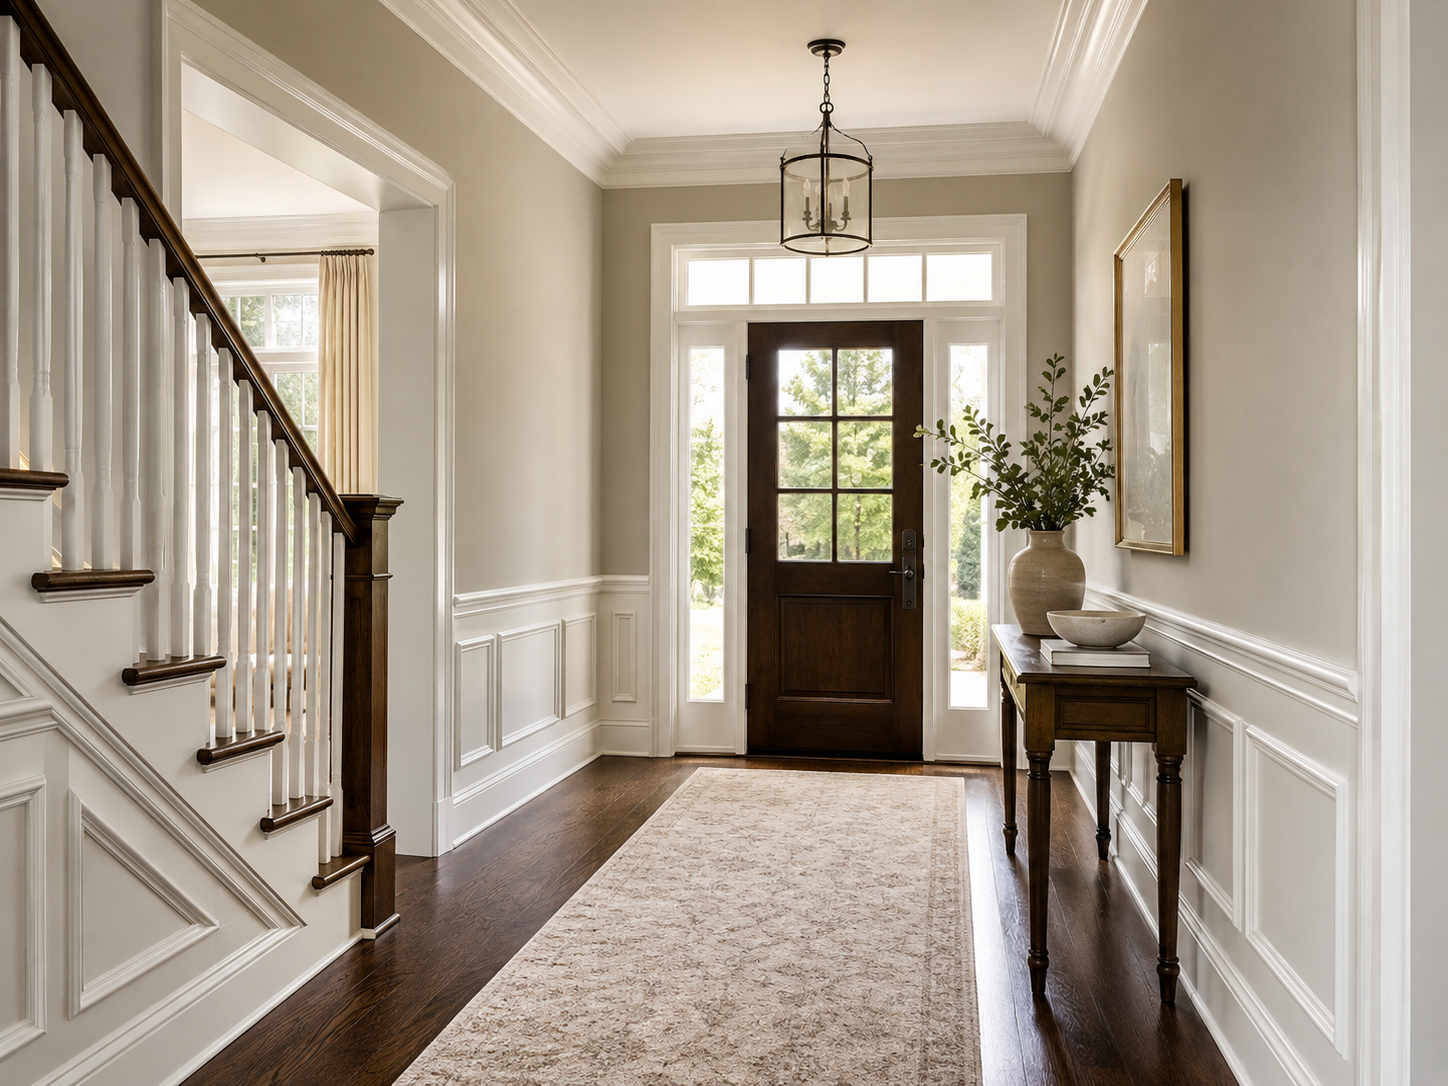
Traditional Panelled Wainscoting
More detailed panel profiles can create greater depth and architectural weight. These treatments work best when panel size, cap details and surrounding casing are proportioned together as one coordinated installation.
Wainscoting Height Should Be Planned for the Room
There is no single height that works for every wainscoting installation. Ceiling height, room proportions, furniture, windows, stair conditions and existing door casing all influence where the upper line should sit.
A dining room may call for a different proportion than a narrow hallway or staircase. Rather than forcing a fixed measurement onto every wall, the layout should be established so the finished treatment feels balanced within that specific interior.
Professional Wainscoting Depends on Precise Layout and Installation
A successful wainscoting installation depends on how the panels relate to the entire room, not just how accurately each piece of moulding is cut.
An experienced wainscoting installer has to account for door casing, baseboards, corners, outlets, wall lengths and changes in elevation before the panel pattern is established. Small layout decisions at the beginning can determine whether the finished installation feels balanced or leaves narrow, awkward panels at the end of a wall.
Existing Toronto and GTA homes can also have walls, floors and trim that are not perfectly level or square. Miter5 plans the installation around the actual conditions of the space so the wainscoting reads as a deliberate architectural treatment rather than a repeated pattern forced onto the room.
Measure the Entire Room
Wall lengths, ceiling height, door openings, windows, corners and existing trim are reviewed before the panel layout is finalized. This establishes the usable space and identifies conditions that can affect spacing.
Balance the Panel Layout
Panel widths and spacing are adjusted across each wall so the pattern finishes intentionally at doors, corners and adjoining walls. The goal is visual balance rather than simply repeating one panel dimension until the wall ends.
Coordinate With Existing Trim
Wainscoting has to meet baseboards, door casing and other trim cleanly. Panel rails, stiles and mouldings are positioned so those transitions appear intentional and the new work feels integrated with the existing architecture.
Install for Consistent Lines
Once the layout is established, the individual components are fitted and aligned so panel heights, spacing and horizontal lines remain visually consistent across the room, hallway or staircase.
Panel widths and moulding terminations are planned around door openings so the wainscoting meets the casing cleanly without awkward leftover spaces.
Existing electrical locations are considered during layout so rails, stiles and panel mouldings do not create unnecessary conflicts with wall devices.
Stairway panels require the upper and lower lines to follow changing elevations while maintaining proportions that remain balanced along the full run.
Variations in floors, walls and corners are evaluated during installation so the finished panel treatment remains visually straight and consistent.
Professional wainscoting installation is largely about controlling proportions and transitions. When the height, spacing, corners and surrounding trim are planned together, the finished work reads as part of the architecture of the home rather than an applied decoration added afterward.
Wainscoting Installation for Rooms, Hallways & Stairways
Different spaces create different wainscoting layout challenges. Panel height, width and spacing have to respond to the walls, openings and changes in elevation found in each room rather than following one standard pattern throughout the home.
Dining Room Wainscoting
Dining rooms are a natural setting for wainscoting because the treatment can establish a continuous architectural line around the room. The layout should be balanced around door openings, windows, furniture proportions and the existing trim.
Hallway & Entry Wainscoting
Hallways and entry areas often contain multiple doors, corners and short wall sections. Panel widths need to be distributed carefully so the pattern remains balanced as it passes through these interruptions.
Stairway Wainscoting
Stairway installations require the panel pattern and upper line to follow changes in elevation. The transition between level walls and sloped stair sections has to be planned so the wainscoting maintains consistent visual proportions.
Living Rooms & Home Offices
Wainscoting can also add architectural detail to living rooms, home offices and renovated interiors. The height and panel scale should suit the size of the room and work with the existing baseboards, casing and ceiling height.
Installation Planned Around the Actual Home
Many homeowners searching for a wainscoting contractor in Toronto or the GTA are adding the treatment to an existing finished home. Walls may not be perfectly square, floors can vary slightly in level and existing door openings may not align conveniently with a repeating panel pattern.
Miter5 measures the space and establishes the complete wainscoting layout before installation so panel widths, spacing and height can be adjusted to the actual conditions of the room.
This approach allows the finished installation to remain visually balanced across individual rooms, hallways and stairways rather than forcing the same dimensions onto every wall.
Questions About Wainscoting Installation
Answers to common questions homeowners ask when comparing wainscoting styles, installation options and professional wainscoting contractors in Toronto and the GTA.
How much does wainscoting installation cost in Toronto?
Wainscoting installation cost depends on the size of the space, total wall length, panel style, material, number of corners and openings, stair conditions and the complexity of the layout. Picture-frame moulding generally involves a different amount of material and labour than a more substantial recessed-panel treatment. Miter5 provides project-specific quotes based on the actual room and scope of work.
What height should wainscoting be installed?
There is no single correct wainscoting height for every room. Ceiling height, wall proportions, windows, door casing, furniture and the overall design of the space should all be considered. The goal is to establish a height that looks proportionate to the room rather than applying the same measurement to every home.
What styles of wainscoting can be installed?
Common options include picture-frame wainscoting, recessed-panel designs, traditional panelled treatments and custom layouts developed around the architecture of the room. The appropriate style depends on the desired level of detail, existing trim, ceiling height and the overall character of the interior.
Can wainscoting be added to an existing finished home?
Yes. Many wainscoting projects are installed in existing finished homes during trim upgrades or renovations. Existing baseboards, casing, wall conditions, outlets and door openings are reviewed first so the panel layout can be designed around the room rather than requiring the space to conform to a standard pattern.
Can wainscoting be installed on a staircase?
Yes. Stairway wainscoting requires additional layout planning because the panel pattern and upper line need to follow the changing angle of the stairs. Horizontal and sloped sections have to transition cleanly while keeping the panel proportions visually balanced throughout the staircase.
How are electrical outlets and switches handled?
Outlet and switch locations are considered when the panel layout is planned. Where possible, panel rails, stiles and applied mouldings are positioned to avoid awkward conflicts with electrical devices. Existing conditions vary from room to room, so those locations should be reviewed before installation begins.
What materials are commonly used for wainscoting?
Paint-grade wainscoting commonly uses MDF and other stable trim materials because they provide a smooth surface and consistent profiles. Wood components may also be appropriate depending on the design and intended finish. Material selection should suit the panel style, room conditions and the architectural detail being created.
How long does wainscoting installation take?
Installation time varies with the number of rooms, total wall length, style of wainscoting, number of panels, stairways, corners and existing site conditions. A simple room and a multi-room project with detailed stair panels have very different installation requirements, so the schedule is determined from the actual project scope.
What should I look for when choosing a wainscoting contractor in Toronto?
Look for a contractor who treats layout as part of the installation rather than simply repeating identical panels around the room. Panel proportions, height, door casing, baseboards, corners, stair angles and existing wall conditions should all be considered before installation begins. A clear project scope and detailed quote also make it easier to compare what is actually included.
Planning Wainscoting for Your Toronto or GTA Home?
Tell us about the rooms, stairways or hallways where you would like wainscoting installed. Miter5 can review the space, style and layout requirements and provide a project-specific quote for professional wainscoting installation.
What to Send Us
A few basic details help us understand the layout and scope before discussing your wainscoting installation.
- Photos of the rooms, hallways or staircase
- Approximate room or wall dimensions
- Ceiling height
- Wainscoting style or inspiration photos, if available
- Your project location in Toronto or the GTA