
Crown Moulding
Crown Moulding Materials and How Angles Meet Ceilings
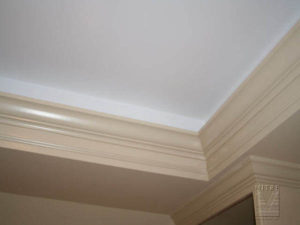
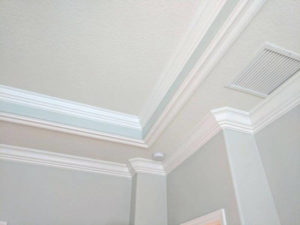
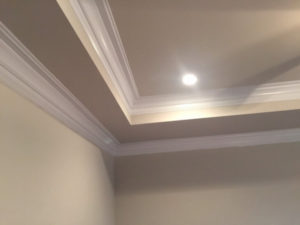
Crown Moulding is a stock wood material that is milled into different profile designs, the main purpose of Crown Moulding is to transform how a ceiling and wall interact with each other. Once crown moulding is installed, it immediately changes the dynamic of the look of how a ceiling and wall meet. Installing crown moulding can be tricky as the bevel molding must meet both angels of the ceiling and wall. Miter5 crown moulding installation contractor services is here to help with all your trim carpentry projects. We install all forms, styles and designs of crown moulding and other types of trim and decorative moulding through your home or commercial space.
What are the Most Popular Crown Moulding Designs
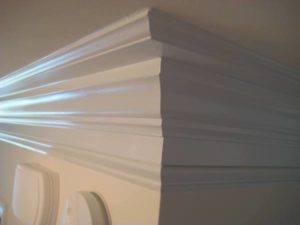
Some of the most popular designs and styles include the colonial style that ranges from 4 1/2 inch to a 7 inch profile. Lately most home owners and builders have designed different forms of crown moulding in order to fit their construction budget (s). The wide the profile is, the more expensive the material costs become, so trim carpenters have used other forms of installing crown moulding while keeping material costs low. They have done so by installing a build-up rather than buying a larger crown profile and they achieve the same look and style.
A room height will help in design and style planning, if a room is a standard 8 feet high, then a profile of no ore than 5 1/2 inch would suit that height appropriately. As a rooms height becomes higher, than a larger profile would be required to match the height and depth of the room where crown moulding is being installed.
Difference Between Crown Moulding and a Cove Moulding
A cove moulding is a cousin yet their are some differences. Cove mouldings bow inward while crown mouldings curve outward. They both interact with a ceiling and a rooms wall making the room more distinct if the room did not have any decorative moulding installed. Crown Moulding like most trim carpentry originated in the 18th century, mainly in the UK but followed quickly in Dutch architectural designs.
What are Some of the Different Building Materials used when Installing Crown Moulding
Currently, medium density fibreboard (MDF) is the most common material used when installing crown moulding across the Toronto and the GTA. Other industrial cities across North America have also preferred using MDF as its main material as it’s light weigh and budget friendly for the consumer or home builder. MDF has also made installation pricing much more affordable when hiring a contractor across the GTA.
Other materials include Poplar wood, Pine and even Oak. Like most trim and decorative mouldings, the finish will determine the best material suited for your project. a stain finish would require a natural wood like Oak. For a paint grade finish, MDF would fit the project criteria perfectly.
Hire A Trim Carpenter For Best Results
Crown moulding is not a typical cove piece of trim that any DIY’er can simply install just because they might have a miter saw handy in their garage collecting dust. The installer needs to know first and for most how to cut the moulding by placing it correctly on the miter saw. Yes, most DIY’ers are aware that crown moulding needs to be inverted on the saw but what most fail to realize that’s only half the battle when cutting any piece of crown moulding trim. Having a crown stop attachment for your saw will help but even a crown stop attachment is not the ideal jig to help place the crown evenly and consistently with all your inside and outside corner cuts.
A great way to ensure all your cuts are made properly is create your own cutting jig. The first step is knowing the type of moulding your working with, is  the moulding a 45 degree cove on both the wall and ceiling or is it a 32 degree and 58 degree piece? The other main factor when creating a jig is knowing the spring angle of the moulding you’re installing, not all spring angles are created equal. Some have a spring angle of 3 inches while a higher and deeper profile moulding might have a spring angle as high as 5 inches. To your right is a image of how Gary Katz built a homemade cutting jig to help with cutting crown moulding properly. This type of jig ensures the miter cuts are made equally while also creating a tight fit on any inside corner. To ensure a tight inside corner, it’s key to know the wall angle if you’re going to miter fit your crown moulding. The other method is to cope cut all your inside corners to ensure a tighter fit without any gaps while also ensuring less cracking over time when a home begins to settle. A crown moulding installation contractor will cope joints rather than miter cut the inside corners as some believe that even though the process is more labour intense, it’s the best method to ensure a clean install.
When searching for any trim carpenter or any other contractor it’s prudent that the home owner interview at least 3 different contractors prior to committing to anyone. Check previous work details while also calling previous clients that the contractor completed work prior work for, reviewing online reviews is also another great method in checking the contractors work ethic and professionalism.
While searching for a trim carpentry and moulding installation service in Toronto and the GTA it’s prudent to hire the right team for your project. Miter5 takes pride in all its work by appalling a simple concept, true craftsmanship is our goal while also taking pride in our work!